PayU Integration on Shopify
PayU offers several applications for Shopify merchants:
- PayU GPO enables payments through redirection to the PayU payment page.
- PayU GPO - BLIK facilitates BLIK payments with redirection to the BLIK platform.
- PayU GPO - Card facilitates card payments with redirection to the PayU card form.
- PayU GPO - Installments facilitates installment payments with redirection to the PayU installment form.
- PayU GPO - PayPo facilitates PayPo payments with redirection to the PayPo form in PayU.
- PayU GPO - Klarna facilitates Klarna payments with redirection to the Klarna form in PayU.
- PayU GPO - Twisto facilitates Twisto payments with redirection to the Twisto form in PayU.
- PayU GPO - PragmaPay facilitates PragmaPay payments with redirection to the PragmaPay form in PayU.
- PayU GPO - Credit Widget informs users about the availability of deferred and installment payments on the product page and in the cart. We recommend its installation to convey information about available financing methods to customers at an early stage of the shopping journey. Detailed installation instructions can be found in the Installing PayU's Shopify Apps section. Configuration information is available in the PayU Credit Widget Configuration on Shopify section.
All applications are designed to simplify transaction management by providing a single interface for handling all payments, analytics, and payouts efficiently.
Installing PayU's Shopify Apps
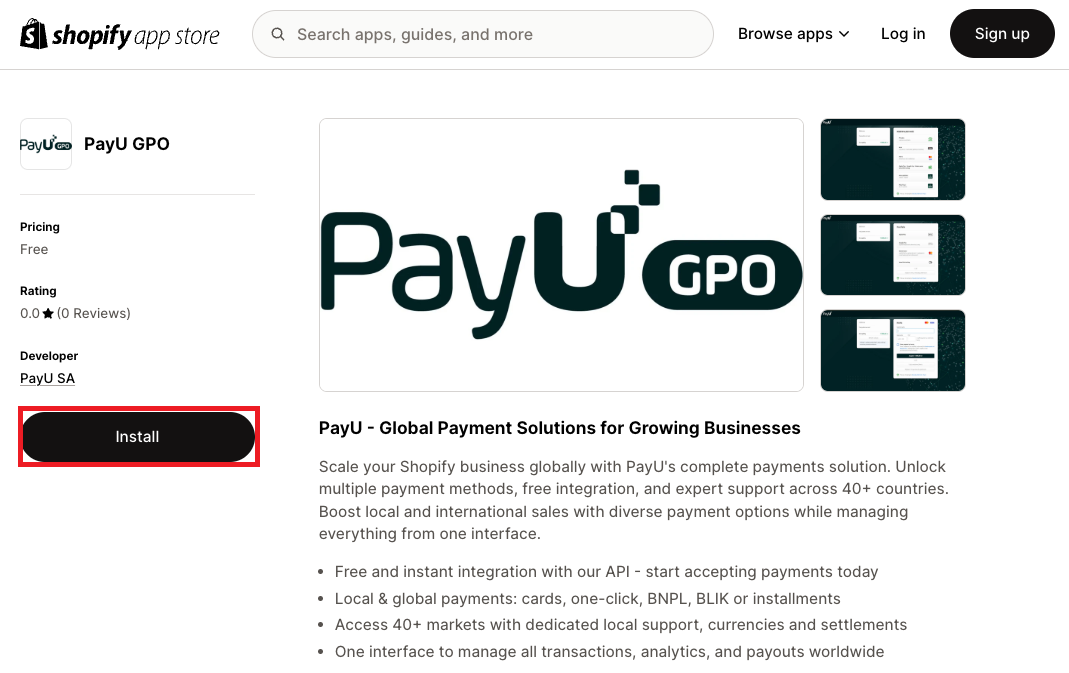
You can install PayU's Shopify apps through the Shopify App Store page.
-
To install PayU's Shopify apps visit Shopify App Store and go to the dedicated pages for PayU's apps (linked in the list above), and click Install button.
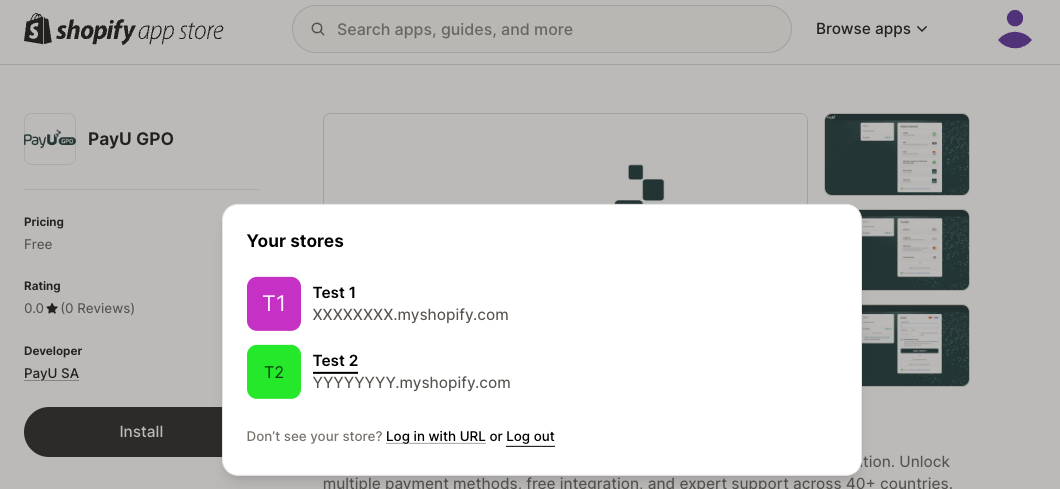
Depending on whether you are logged in to the Shopify App Store, you might need to select which shop to install apps on.
- If you are logged in to the shopify app store
- If you are not logged in to the shopify app store
Applications will be installed on the currently active shop.
You will be asked to log in and choose shop on which you want to install the app.
-
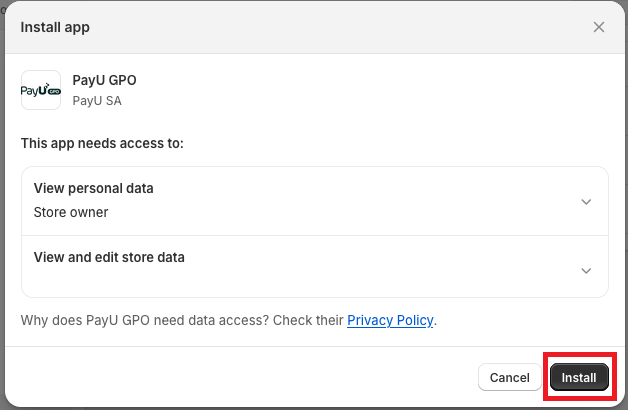
Next, a popup will appear prompting you to confirm the app installation and agree to share the necessary data required by the app. If you agree to share the data, click Install.
After installation is complete, you will be redirected and prompted to provide configuration keys from your PayU shop. Find more details on the configuration in the Configuring PayU's Shopify Apps section.
Configuring PayU's Shopify Apps
...the shop's base currency in Shopify must match the currency of the shop in PayU.
-
After installation is complete, you will be redirected to the configuration page. Here, you'll need to provide your configuration keys:
- pos_id,
- Second key (MD5)
- OAuth protocol - client_id,
- OAuth protocol - client_secret
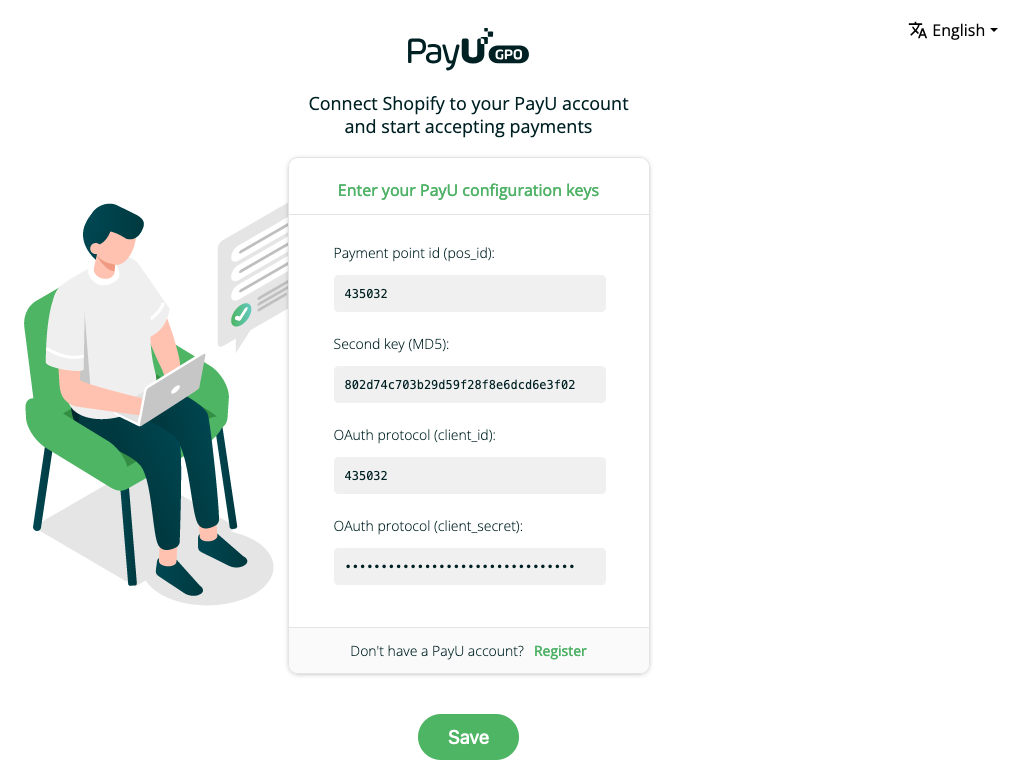
Providing the keys is essential to connect your PayU account with the app on Shopify. You can find more information about the configuration keys in the What is a Point of Sale? section.
-
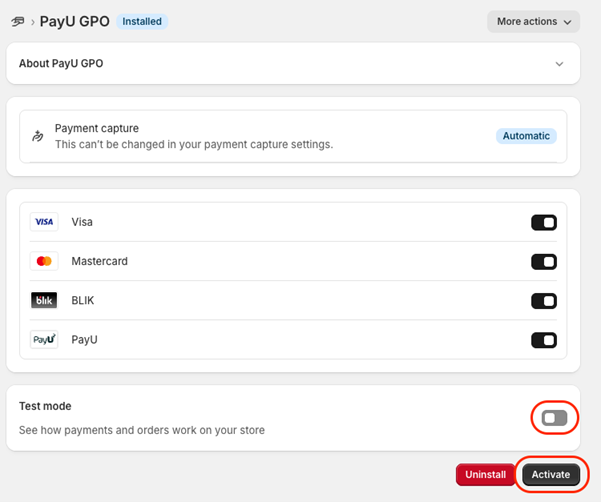
After adding the necessary configuration keys, you will be redirected back to the dashboard. There, you can enable payment methods using toggles next to their names and clicking the Activate button. You can enable Test Mode to simulate a successful transaction. Remember to disable it before enabling the payment functionality for the real users.
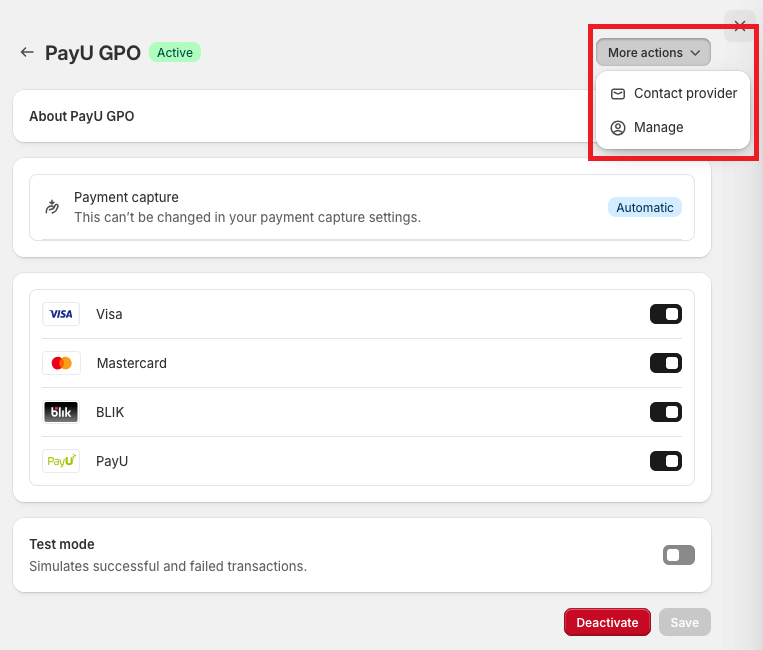
Now you're all set to use PayU's Shopify apps. To update the application's configuration, simply click the More actions button and select the Manage option at any time.
PayU Credit Widget Configuration on Shopify
Not all Shopify store themes support widget display. After installing the application, verify whether the widget displays correctly.
After completing the installation, you will be redirected to the configuration page where you should:
- Acitvate the widget by enabling the Plugin enabled checkbox.
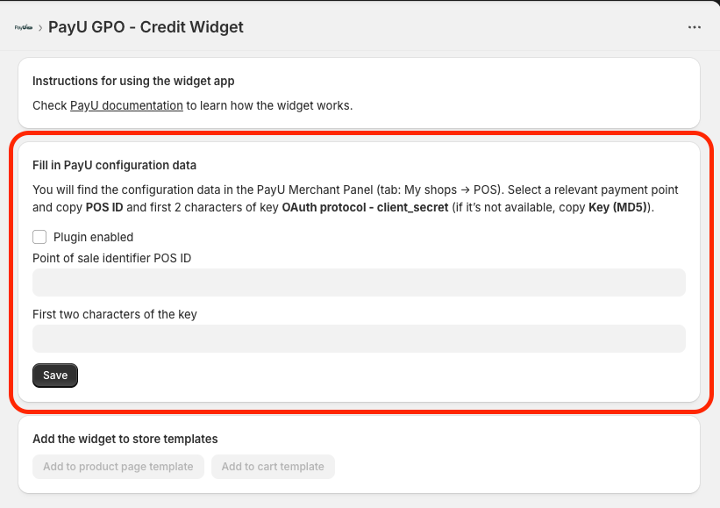
- Next, you need to provide your PayU shop configuration data:
- Point of Sale identifier POS ID, which can be found in your PayU Management Panel. More information can be found in the What is a Point of Sale? section.
- First two characters of the appropriate key - the key is defined depending on the type of point of sale and consists of digits and letters a-f. You can find it in your PayU Management Panel:
- for Rest API - first two characters of the
OAuth protocol - client_secret. - for Classic API - first two characters of the
Second key (MD5).
- for Rest API - first two characters of the
Adding the widget to the Shopify store page
After installation and configuration of the widget, the Add widget to store templates section will be activated.

Not all Shopify store themes support widget display. If the configuration data is saved, and the above buttons are still inactive, it means that the template is not supported by the application.
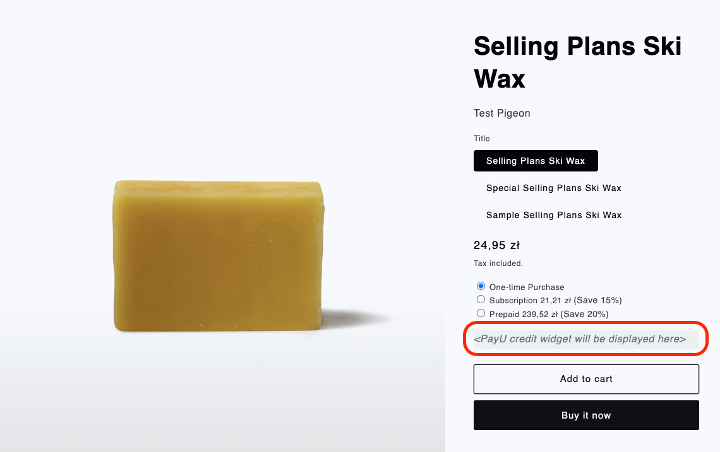
Adding the widget to the product page template
- Select the Add to product page template button.

- You will be redirected to the Shopify template editor. The application with the widget will be automatically added to the template.
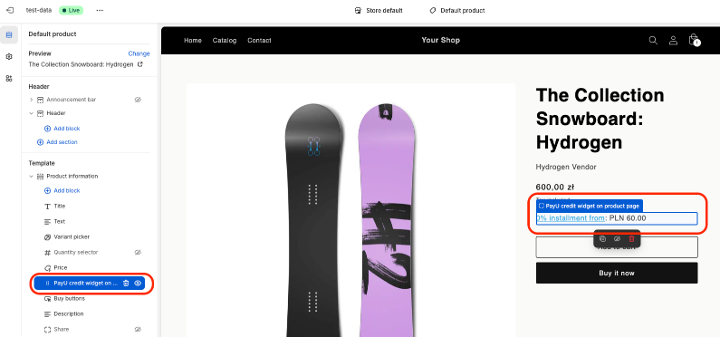
When the product price is outside the range supported by the widget, the editor will present only placeholder text that will not be displayed on the target page shown to customers.
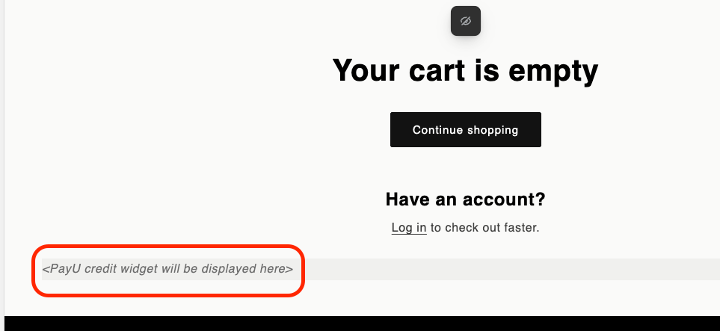
Adding the widget to the cart page template
- Select the Add to cart page template button.

- You will be redirected to the Shopify template editor. The application with the widget will be automatically added to the template.

When the cart amount is outside the range supported by the widget, the editor will present only placeholder text that will not be displayed on the target page shown to customers.
Alternative way to add elements to the store template
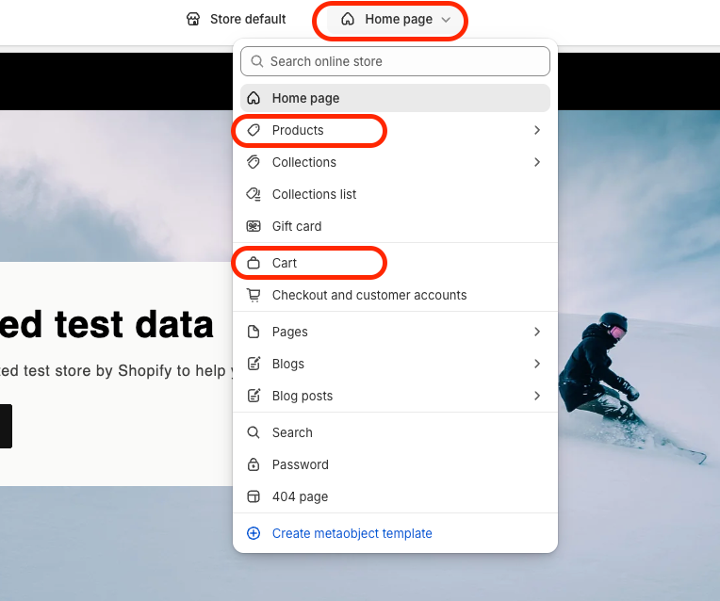
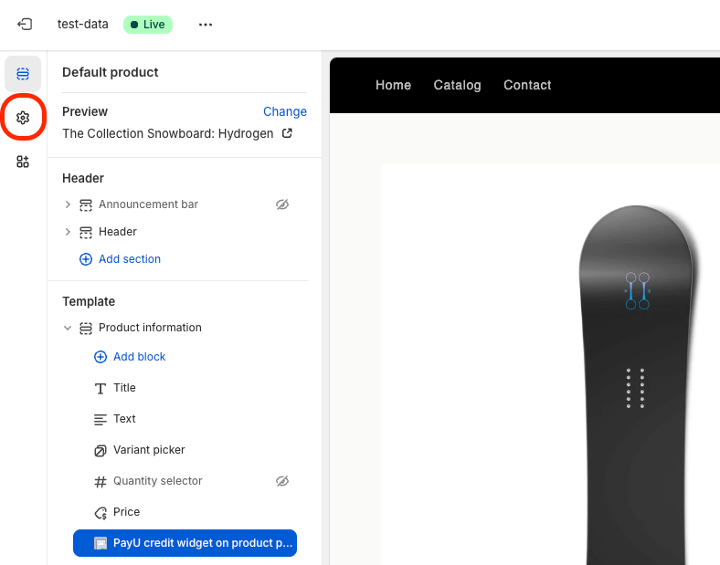
- In the Shopify admin panel, go to the template editor using the Edit theme button in the Sales channels > Online Store > Themes section.

- Select one of the templates where the application can be added.
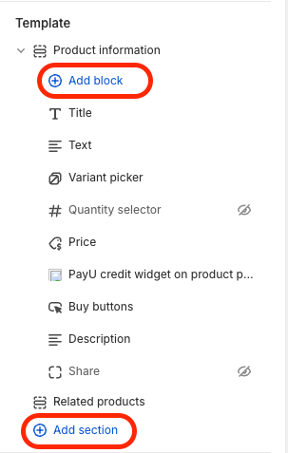
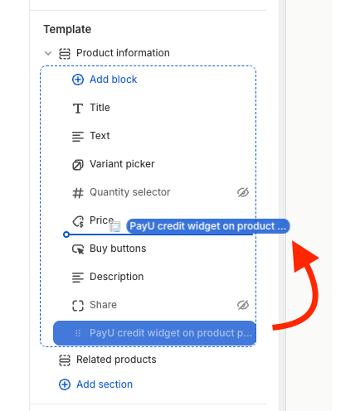
- Select Add block or Add section in the Template section, depending on where you want to add the widget.
-
Select the PayU GPO — Credit Widget app in the Apps section.
-
Widget will appear in the selected template.
When the amount considered by the widget is outside the range supported by the widget, the editor will present only placeholder text that will not be displayed on the target page shown to customers.

Credit Widget Visualization
- We recommend moving the widget location via drag and drop technique to the vicinity of the product/order amount. This can be done by moving the widget application in the Product information / Subtotal editor.
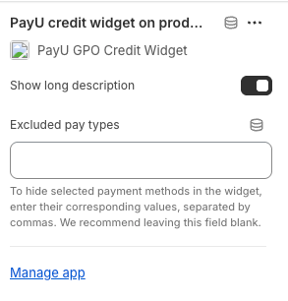
- After selecting the application with the widget, you can configure the widget display options:
- Show long description – automatically displays an additional description before the presented amount, depending on the available payment methods. It is recommended to leave this setting enabled.
- Excluded pay types - a list of payment methods excluded from widget display. You should enter values from the first column of the table in the Installments and Pay Later Payment Methods section. We recommend leaving the list empty and excluding methods only in special cases.
-
By default, the widget displays the lowest possible installment amount of 0% installment option (including currency) offered by PayU Installments - if such option is available. In the absence of 0% installment options, the widget shows the lowest possible installment amount including margin (also with currency). If the PayU Installments method is not available, the amount to be paid under the PayU Pay Later service is displayed. By default, all these amounts are blue:
rgb(29, 175, 236). -
If you want to apply specific widget styling, go to the Theme settings section in the theme editor.
- Next in the Custom CSS section, you need to add an entry that overrides the default values.
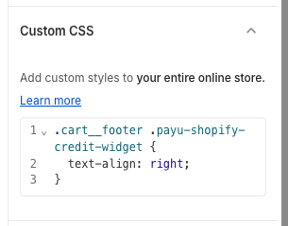
Below is an example of CSS code that aligns the widget text to the right:
.payu-shopify-credit-widget {
  text-align: right;
}
You can also use more precise CSS selectors to modify the appearance of the widget only in the cart or only on the product page.