Management Panel
To gain access to production management panel, first you must register with payu. On the other hand if you want to create an account on the test environment you have to go to the Sandbox registration page and and provide address email. When you have your account created, you can either log in on the production or the Sandbox environment.
What is a Management Panel?
The Management Panel is a user interface of the PayU application provided to registered PayU users. From the panel, you can, among other things, accept (with automatic receipt disabled), cancel, refund or withdraw funds. Here you can create shops and payment points (POS), in which you can view the balance of processed transactions and other related details. You can also generate reports or view transaction history.
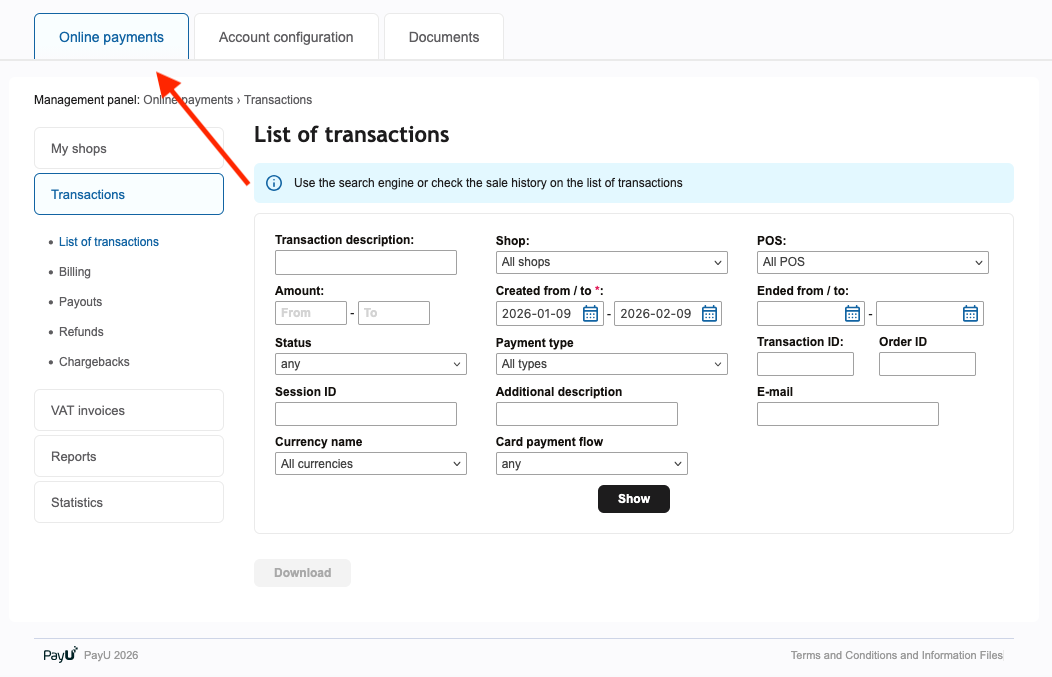
The management panel consists of three main tabs, each serving specific purposes:
-
Online Payments: This is the primary tab where you can access comprehensive information related to established shops, payment points, transactions, and detailed reports.
-
Account Configuration: In this tab, you can manage the company's registration data, contact information, and user details associated with the account.
-
Documents: The Documents tab allows you to conveniently add and view any required documents requested by PayU during the registration process.
What is a Shop?
In the management panel, the primary entity is a "shop". A shop serves as the central hub for managing incoming transactions processed by PayU. You can effectively oversee and handle transactions related to each individual shop.
Each shop is associated with a specific currency, predetermined by you. This currency serves as the designated one for the funds deposited into that particular shop.
You can set up multiple shops on your account, and each shop will have a separate balance, transaction history and payment points. Each URL from which transactions are processed must have a separate shop.
Until your company is activated, you may add a maximum of 3 shops.
Adding a Shop
To create a shop in the PayU Management Panel:
- Go to the Online Payments tab.
- Select the My Shops tab from the sidebar.
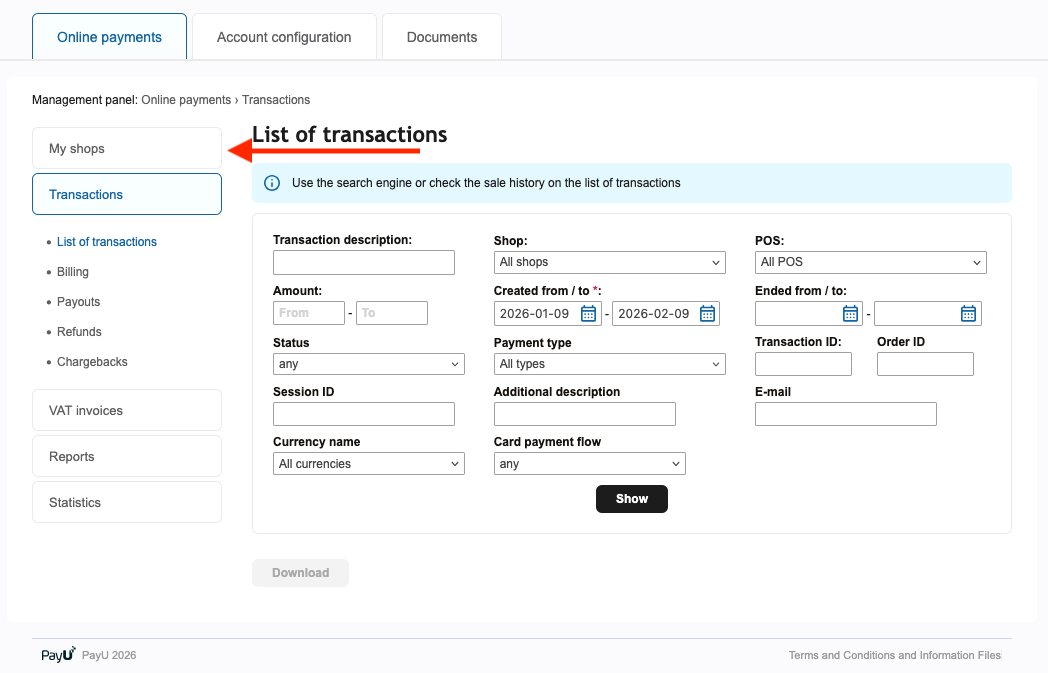
- Click the Add shop button.
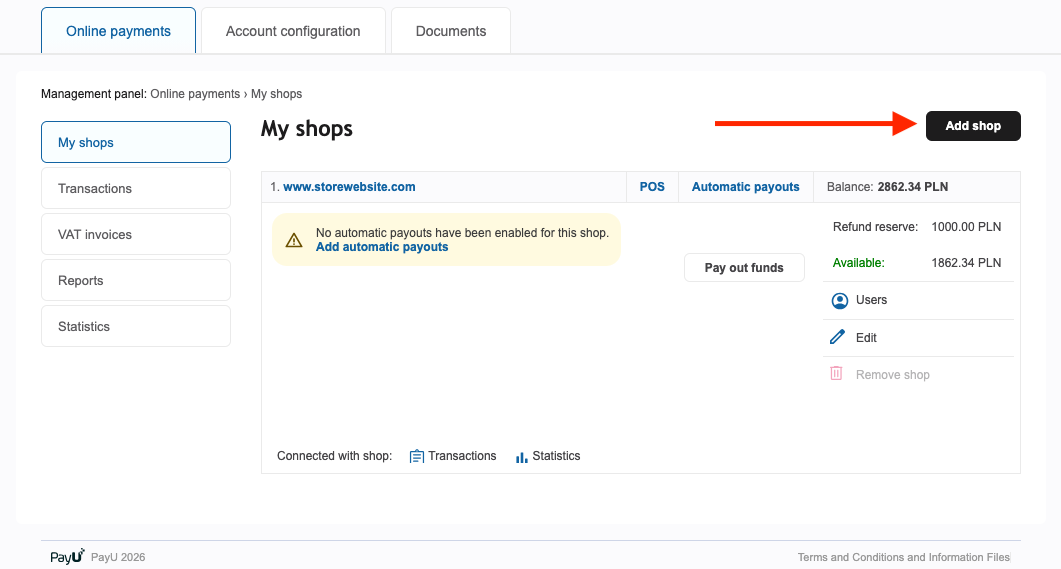
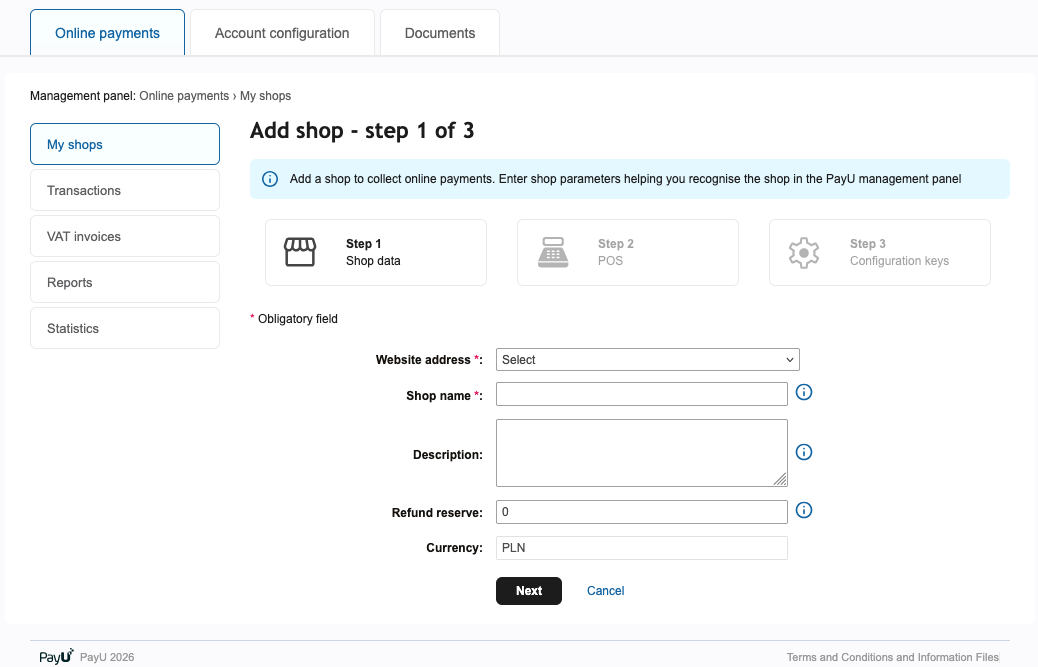
At this point, you will be shown the first step of a short three-step process. Follow the instructions and you will soon have access to a new shop with a payment point and new authorization credentials.
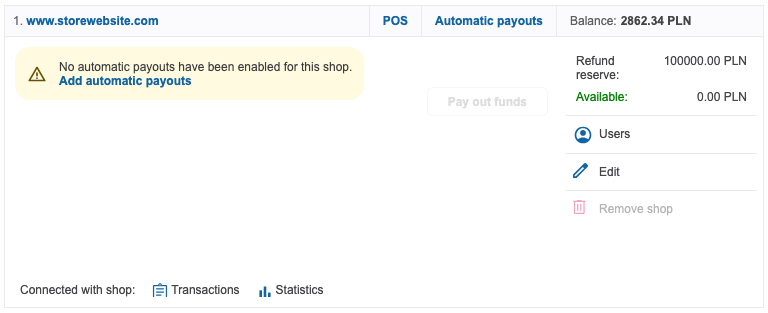
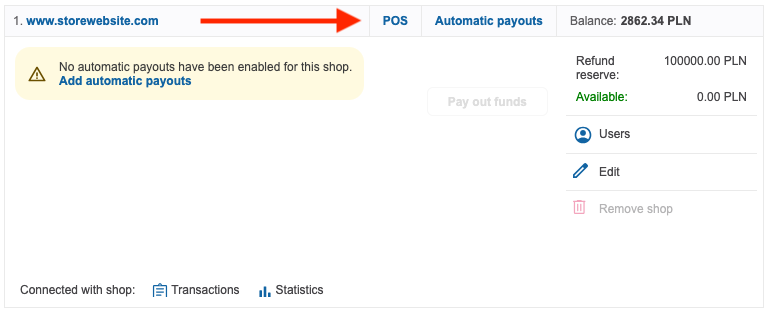
Adding Additional Shop Users
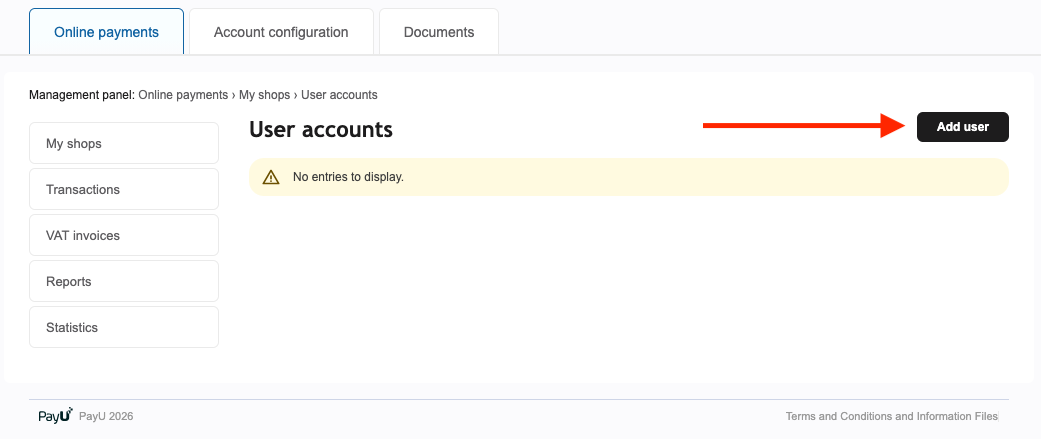
- To add a new user for the specific shop you have to choose the Users option on the shop tile.
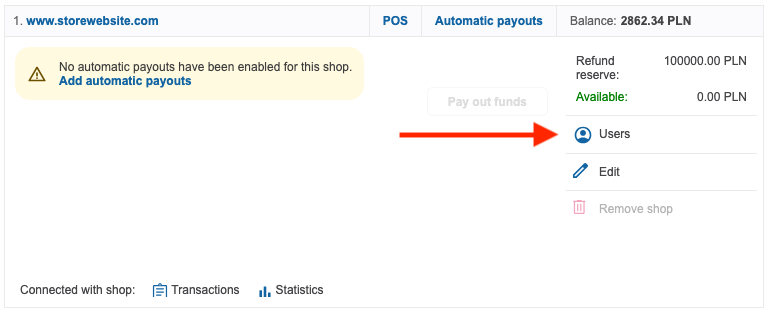
- You will see user management panel where you will find all users that you created. If you want to add new user press the Add user button.
- Next you will see the user creation form where you will need to enter the user's details such as: email address, first name, last name and phone. You will also need to specify the user's type, which determines their level of access.
The email address used to create the user will be a username required to log in to the user's account.
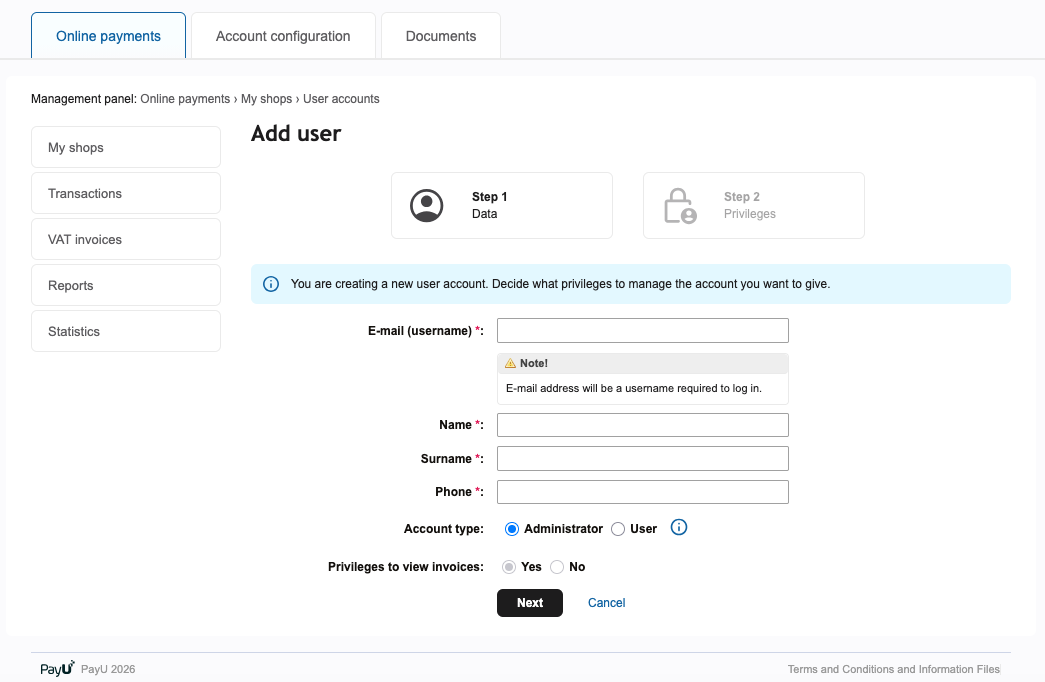
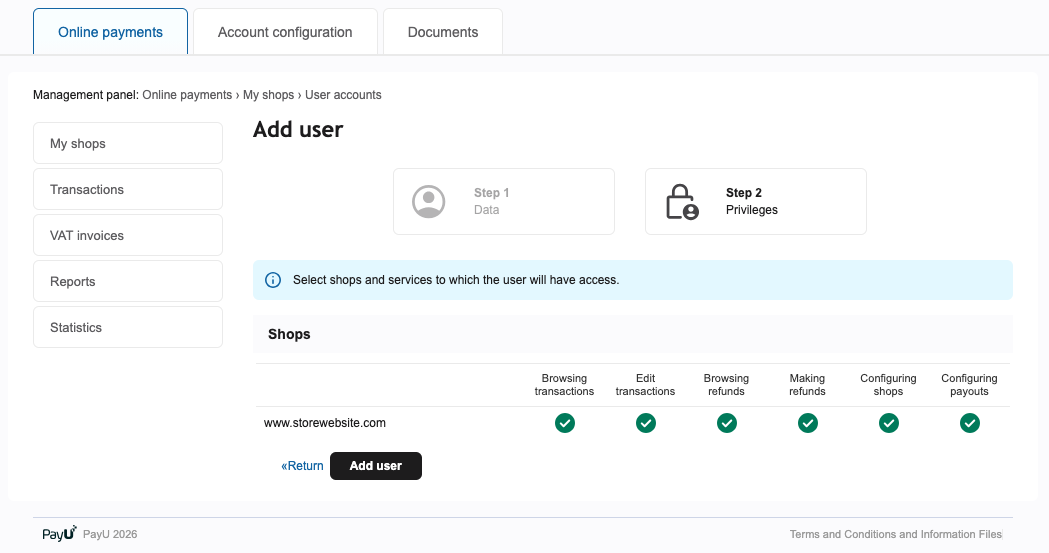
Depending on the chosen account type, users will have varying levels of access within the management panel. The access level will be tailored to the specific account type and its associated permissions.
- Administrator
- User
Administrator has access to every option in the shop.
On the other hand, normal users can have their permissions changed on the fly.
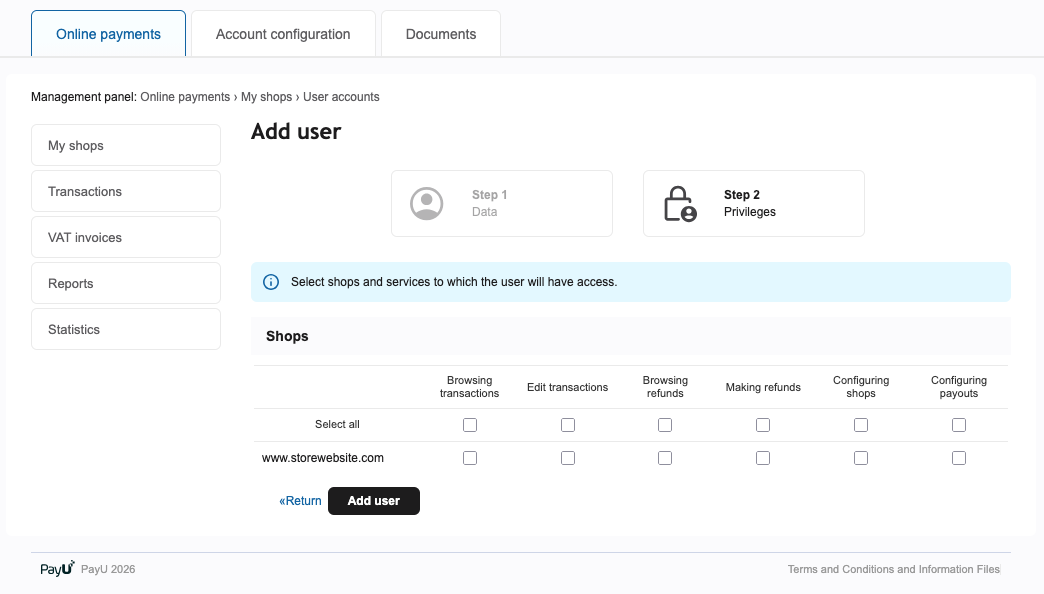
- After setting the user's access level, press Add user to complete the process and create the new user.
What is a Point of Sale? (POS)
A point of sale (POS) is a set of settings, related to how an order can be paid and how it should be presented to the payer. Each POS can have separately defined payment methods and parameters of offered services. The first POS is set up when a particular shop is created. Subsequent POS, if required by your business, can be created by yourself.
Until your company is activated, you may add a maximum of 3 POSes in scope of one shop.
Each POS contains configuration keys that are required to authorize and create of transaction requests in PayU.
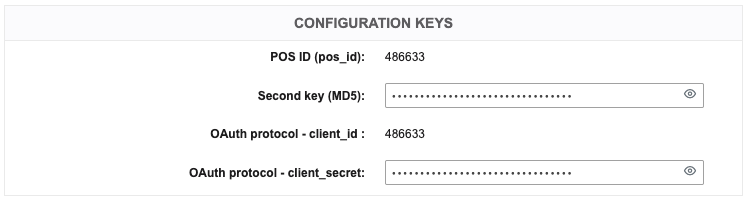
- client_id - is the POS identifier for which the transaction will be carried out,
- client_secret - is an authorization key to authenticate a request for a specific POS.
Never share your keys!
Adding a POS
As was mentioned earlier, the first POS is created when you set up your store. You can set up subsequent POS yourself by going to the POS tab on the shop tile.
You will see a screen with a selection of previously created POSes and two buttons to set up new ones.
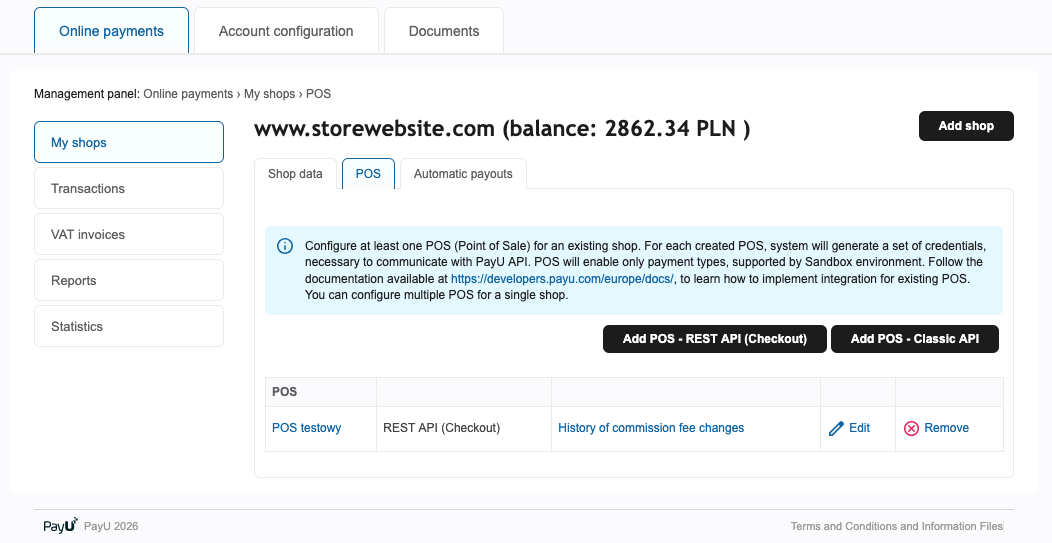
There are two types of POSes available: REST API (Checkout) and Classic API.
-
REST API - The standard way to integrate with PayU. Allows you to support all PayU payment channels (this is the recommended option, as Classic API is not actively developed anymore),
-
Classic API - Non-standard method of integration with PayU. If you choose this option, you will also need to select data encoding and provide URLs: return (after erroneous and correct payment) and reports (skip this field if your store does not provide customers with information about the transaction status changes).
Once you have created a POS, you will have access to basic information about it:
- its name and the data coding type,
- configuration keys that are used while creating an order,
- payment methods that are available on this specific POS.
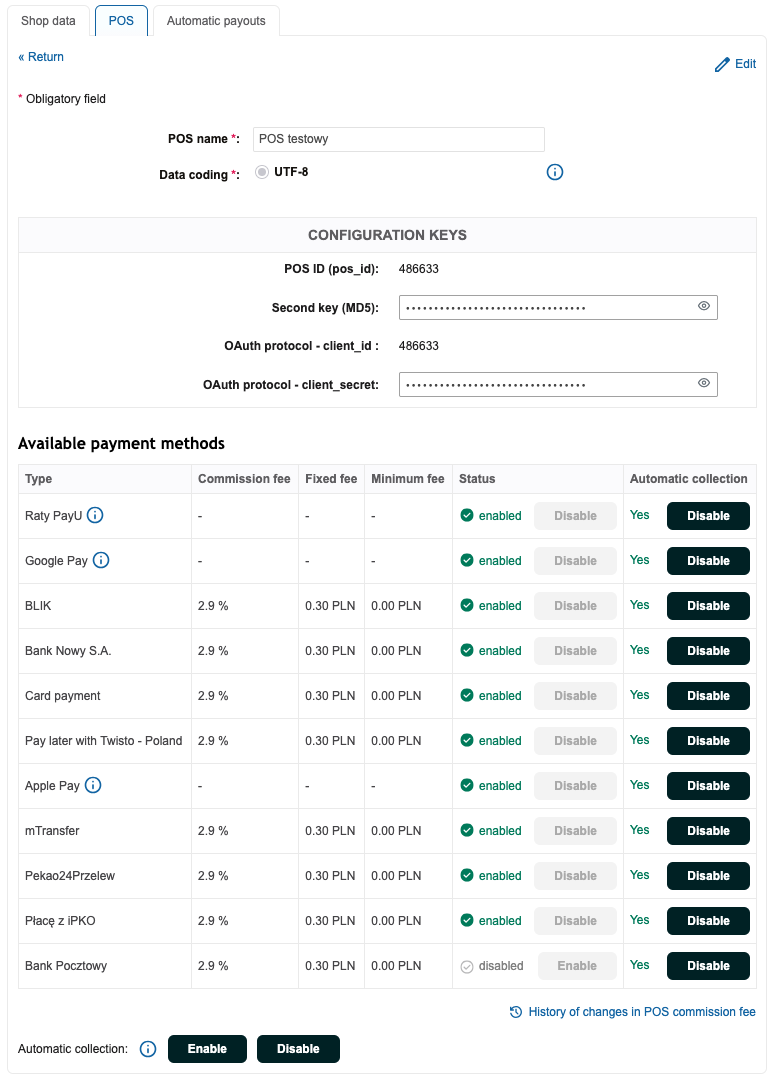
Managing Automatic Collection
In the POS configuration tab, you can manage automatic collection for each payment method available at this POS. Just go to the Automatic collection column, where you can enable or disable it for each payment method individually.
This is all you need to get started with PayU, we recommend for you to browse through the panel and get familiar with it. If you have some questions please contact our customer or ask your sales representative in PayU.
Now that you are registered and know your way around management panel, let's explore available integrations in PayU. Click away to the next page.
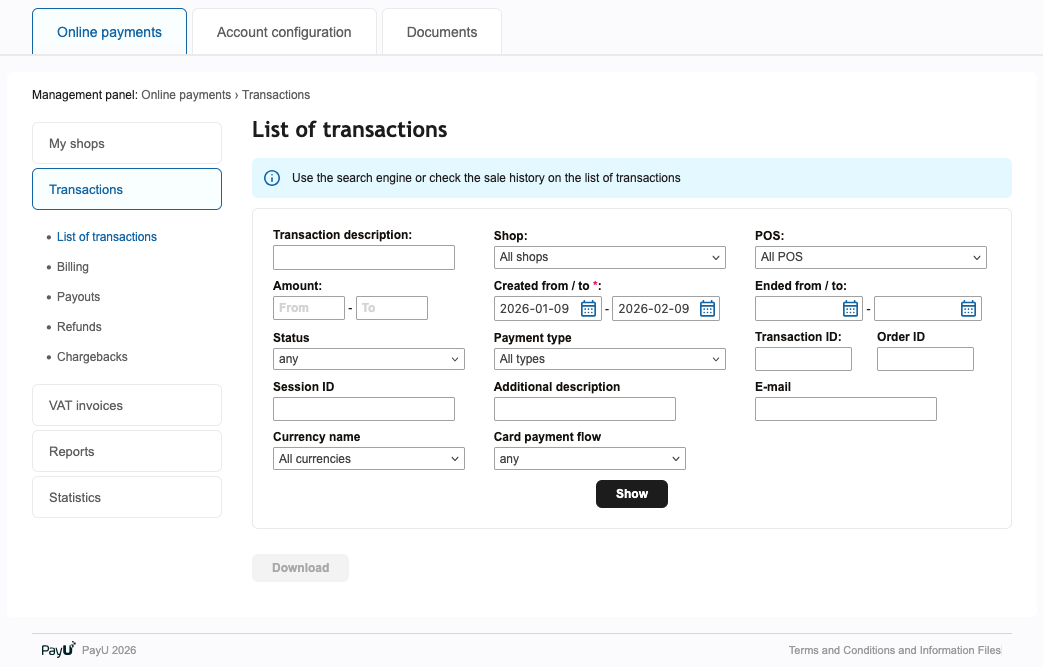
Generating Reports
In the management panel, you can generate reports that provide insights into your transactions and financial data. To access the reporting features, navigate to the Online Payments tab and select the Reports option from the sidebar.

Here, you can choose if you want to schedule periodical reports or generate a one-time report on demand.
Periodical Reports
Periodical reports are generated automatically at specified intervals, such as daily, weekly, etc. You can customize the report parameters, including the type of data included and the format of the report, and more. Once set up, these reports will be delivered to your designated email address or made available for download in the management panel.
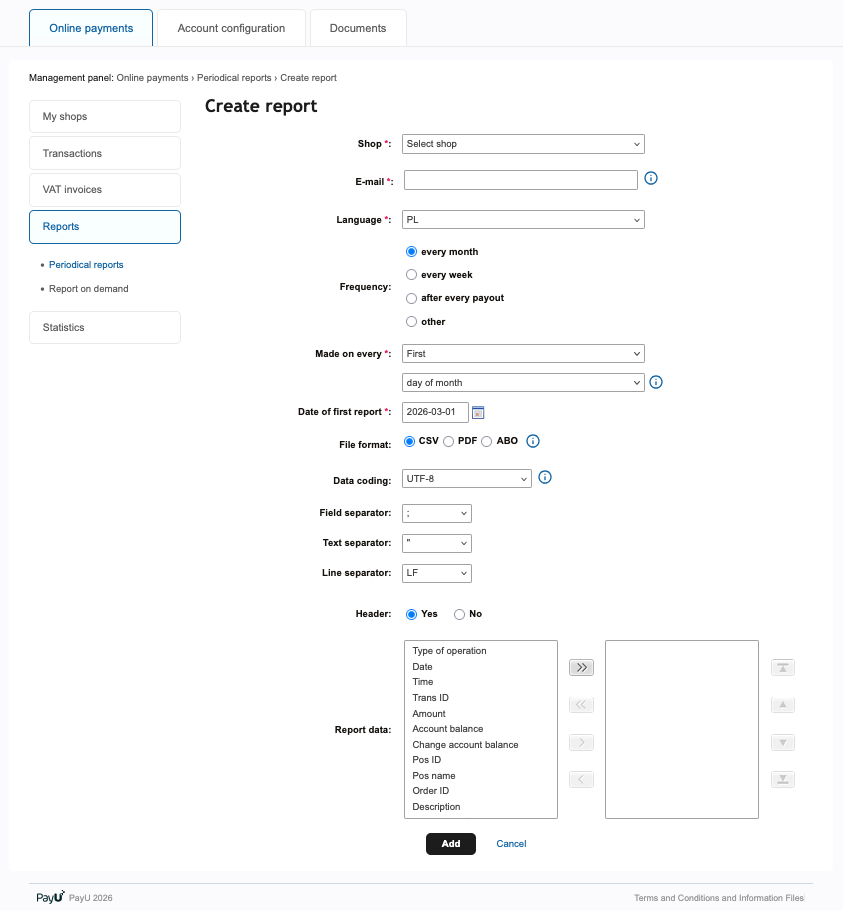
To schedule a periodical report:
- Go to the Periodical reports tab.

- Click the New periodical report button.

- You will be presented with a form where you can specify the report's details. Fill in the required fields, marked with an asterisk (*), and click the Add button to save the report.
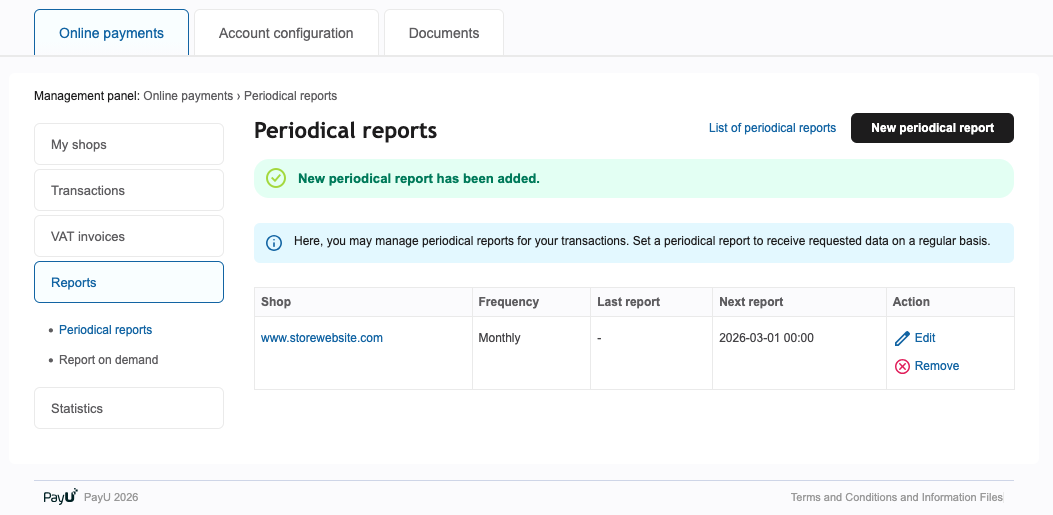
After creating the report, it will be listed in the periodical reports section, where you can view its details, edit its parameters, or delete it if it's no longer needed.
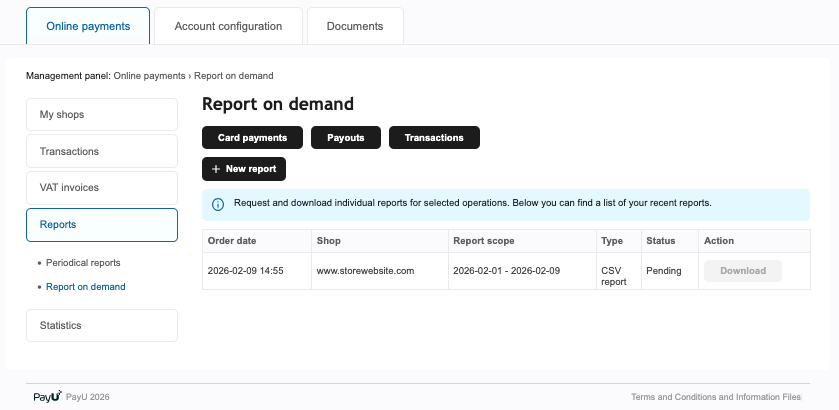
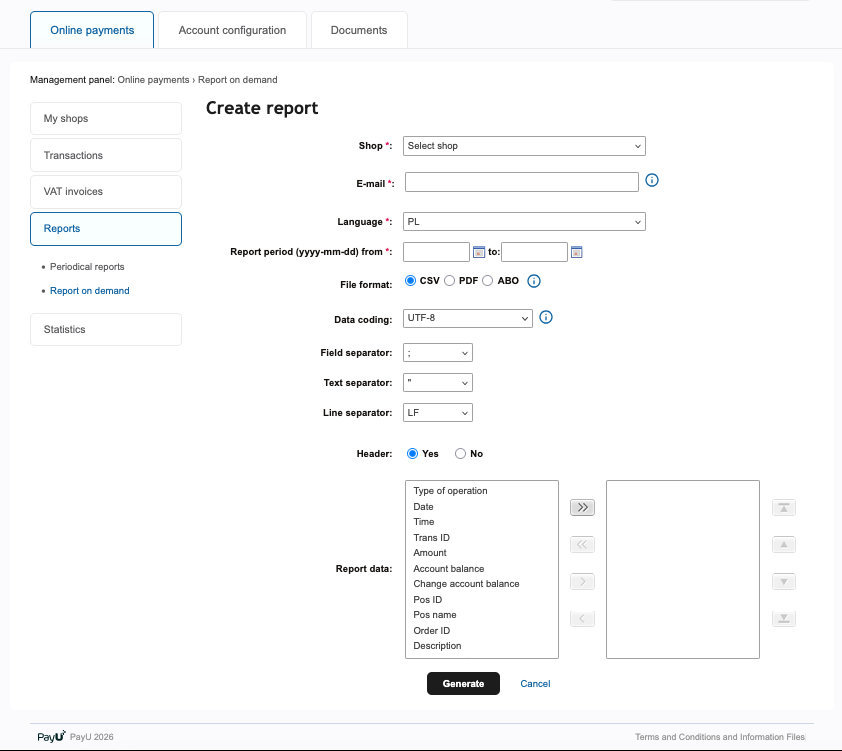
On-Demand Reports
On-demand reports allow you to generate reports instantly based on your current needs. You can specify the parameters for the report, such as the date range, change to account balance, and other relevant filters. Once you submit the request, the report will be generated and made available for download.
To generate an on-demand report:
- Go to the Report on demand tab.
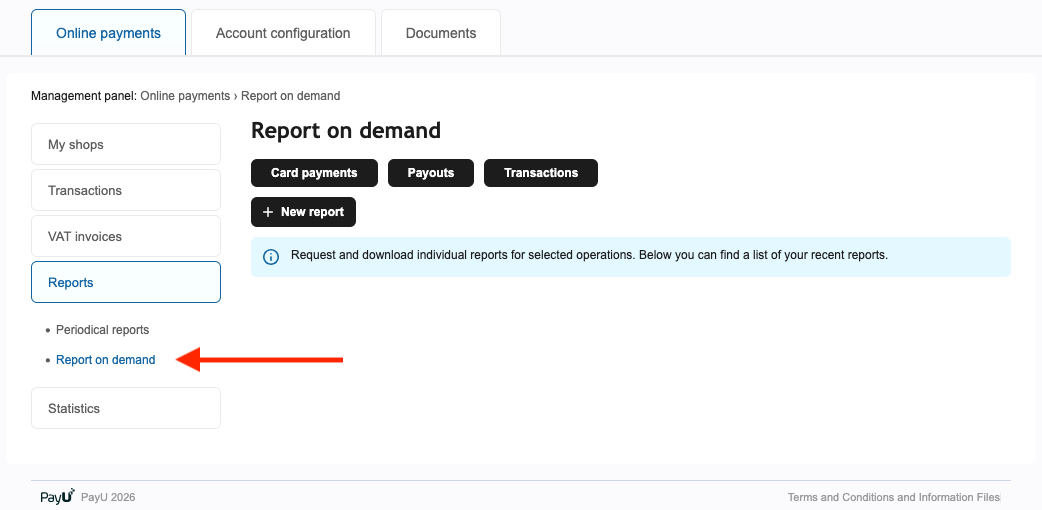
- Choose one of the available report types or just create a New report.
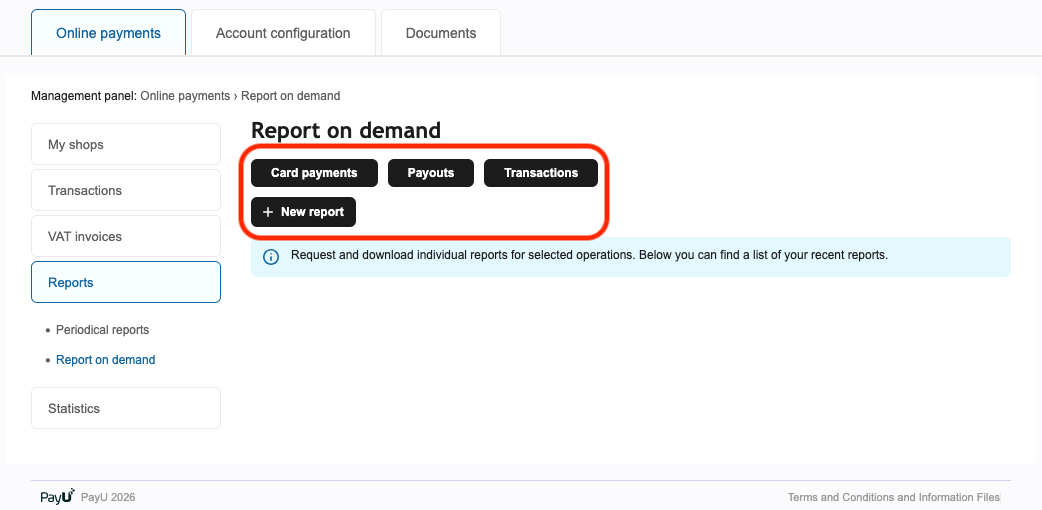
- Fill in the required fields, marked with an asterisk (*), and click the Generate button to create the report.
After the report is generated, it will be listed in the on-demand reports section, where you can view its details or download it for further analysis.